A pull-up looks simple: grip the bar, brace your body, and rise until your chin clears it. For beginners, that small movement can demand considerable grip, back, arm, and core strength. Progress is not always tidy. Some days, the bar barely moves; that does not mean your training has failed. Form matters.
How to get better at pull ups for beginners? Start by building strength you can control, rather than chasing a full repetition at any cost. The CDC’s 2022 National Health Interview Survey found that roughly one in four U.S. adults met both aerobic and muscle-strengthening activity guidelines. That figure is population-level context, not a pull-up benchmark. Still, it shows why consistent strength work deserves attention. The American College of Sports Medicine’s 2024 Worldwide Survey of Fitness Trends offers an industry snapshot of how professionals approach exercise programming, including strength-focused training. This guide turns those principles into practical steps: assisted repetitions, controlled negatives, dead hangs, and sensible rest. Small steps count. A resistance band can help, but using less assistance over time is the real test. Results vary with body weight, training history, recovery, and technique, so no single timeline fits everyone. The goal is not a perfect-looking workout. It is a stronger, safer repetition—built patiently, one honest attempt at a time.
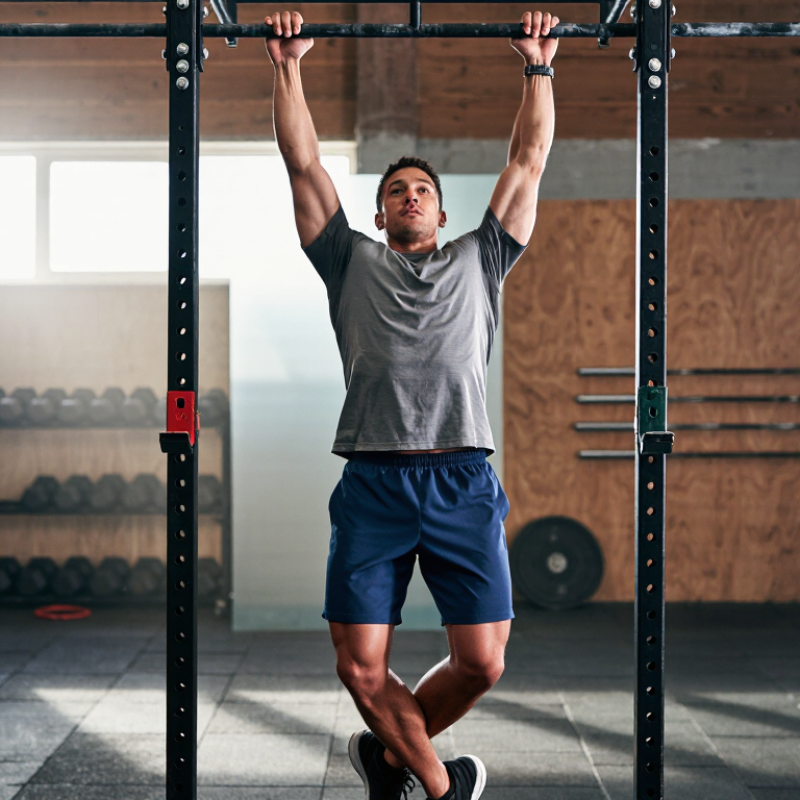
A pull-up is a pulling movement: you grip an overhead bar and raise your body until your chin clears it. Your back and arms do much of the work, while your shoulders and trunk help keep the movement controlled. Grip the bar slightly wider than shoulder width, and avoid swinging to create momentum. A clean repetition matters more than a rushed one. That is harder than it sounds.
Before training, note your starting point without forcing a maximum effort. Can you hang comfortably for 10 seconds? Can you perform a few small, controlled shoulder-blade pulls while keeping your elbows straight? If you can already do pull-ups, record how many strict repetitions you complete, stopping when your form changes. Use the same grip and range of motion when you test again. Write down the date, repetitions, and any discomfort. A notebook works.
A beginner baseline is not a pass-or-fail test. It helps you choose a sensible starting level, such as supported hangs, assisted repetitions, or controlled lowering practice. Rest between attempts; tired grip can make technique messy. If you feel sharp pain, stop rather than trying to push through it. I used to count a half-rep as progress, then realized that made comparisons less useful. Be honest, and adjust the test if the bar or setup feels unstable.
Tip 1: Build a steady grip before chasing repetitions. Hang from a secure bar with hands slightly wider than shoulder width, ribs relaxed, and shoulders away from your ears. Try three 10–20-second holds, resting between each. Stop before your fingers slip. If a full hang strains your shoulders, keep your feet lightly supported. Small steps count.
Tip 2: Train your shoulder blades to move with control. From a hang, keep your elbows straight and draw your shoulder blades gently down, then release. Try five to eight repetitions. Add assisted pull-ups or foot-supported lowers only while your movement stays smooth. The WHO’s 2020 Guidelines on Physical Activity and Sedentary Behaviour recommend strengthening all major muscle groups at least two days weekly. Use that as a schedule guide, not a reason to train through pain.
Tip 3: Give your back repeatable practice with rows and assisted pull-ups two or three times weekly, leaving recovery time between hard sessions. Keep your chest steady and guide your elbows toward your ribs. Avoid swinging. A mirror can reveal shrugging, but it cannot tell the whole story. Check whether you are rushing the lowering phase. Slow it down. Stop if you feel sharp pain.
Learning a pull-up starts with controlling the parts of the movement, not chasing a full repetition. Hang from a sturdy bar with your hands just wider than shoulder-width, and keep your ribs gently tucked. If a full hang feels uncomfortable, use a box so your feet can support some weight. Practice scapular pulls by drawing your shoulders down without bending your elbows. Small movements count. They teach you to start from your back, rather than shrugging toward your ears.
Build strength with exercises you can repeat cleanly. Try rows beneath a low, secure bar, or use a resistance band for assisted pull-ups. Choose enough help to move smoothly; too much assistance can hide weak control. Lower yourself from the top over three to five seconds, stepping back onto the box between repetitions. Keep your legs quiet and avoid swinging. Rest between sets, especially when your grip begins to slip. Progress may feel uneven. Mine would, too. Reduce the assistance gradually, and stop if you feel sharp shoulder or elbow pain. A little forearm fatigue is common, but pain is a reason to adjust the exercise and seek qualified guidance if it persists.
Pull-ups become more manageable when assistance is a training tool, not a shortcut. Start with a resistance band or an assisted machine, using enough support to move smoothly. Keep your ribs gently tucked, grip just outside shoulder width, and pull your elbows toward your sides. Lower for about three seconds; don’t drop into a loose shoulder position. Stop when your form changes, even if you haven’t reached your target reps.
Try three sets of five to eight assisted reps, two or three times a week, with rest between sets. When the reps feel controlled, reduce the assistance slightly or add one clean rep. Change one thing at a time. You can also practice slow negatives: step to the top position, then lower for four to six seconds. If you swing or shrug to finish, use more assistance. Small adjustments count. Sharp pain is a reason to stop, not push harder.
A lighter band can look like progress, but kicking through each rep changes the task. Track your assistance, reps, and how the final repetition feels. Progress may stall for a week; that’s useful information, not failure. When you can do several controlled reps with little assistance, try one unassisted pull-up after warming up. If you miss it, return to assisted work and let your shoulders and elbows recover before your next session.
Example beginner session: suggested working-set ranges for common pull-up exercises. These are practical starting points, not guaranteed outcomes.
Simple guide: Choose assistance that lets you use controlled form. When you can complete the top of your rep range comfortably, gradually reduce the assistance.
Pull-ups improve through steady practice, not repeated max-effort attempts. Choose two or three sessions each week, with a rest day between them. Begin with a variation you can control, such as a band-assisted pull-up or a feet-supported hold. Keep your shoulders active and lower yourself smoothly. Stop before your form breaks. Small, clean sets often teach better movement than struggling through one shaky extra rep.
Tip: Write down each variation, set, and repetition. Try three sets of three to five controlled reps, adjusting the assistance when needed. Add a little work only when your current sets feel solid. Some days will feel weaker. That is useful information, not failure.
Recovery is part of the plan. Sleep well, eat regular meals, and avoid hard pulling sessions on consecutive days. If your elbows or shoulders hurt, pause and reassess rather than pushing through sharp pain. Every few weeks, review your notes and choose one modest next step, such as reducing assistance slightly. Progress can stall, and it is tempting to change everything at once. Resist that urge. Keep the schedule manageable, and give each adjustment time to work.
| # | Tip | Practice Plan | Recovery and Progression | What to Track |
|---|---|---|---|---|
| 1 | Choose a clear starting point | Record a comfortable set of strict pull-ups if you can do them. If not, note which variation you can perform with controlled form, such as an assisted pull-up or a body-weight row. | Use the same grip and range of motion when you retest so results are easier to compare. Avoid repeated all-out attempts. | Variation, assistance level, repetitions, and any form changes. |
| 2 | Set a repeatable weekly schedule | Plan 2–3 pull-up-focused sessions per week. For example, train Monday and Thursday, or Monday, Wednesday, and Saturday. | Leave about 48 hours between demanding sessions for the same muscles. Adjust the schedule if soreness or fatigue affects your form. | Training days and whether you felt ready for each session. |
| 3 | Warm up before working sets | Spend 5–10 minutes warming up, then do easy shoulder and upper-back movements, such as arm circles, light rows, or a few controlled scapular pulls. | Keep the warm-up comfortable rather than tiring. Begin the main exercise with an easier set before using your planned difficulty. | Whether the shoulders and elbows feel comfortable during warm-up. |
| 4 | Use assistance to practise the full movement | Try 3 sets of 5–8 assisted pull-ups. Choose enough assistance to lift smoothly, lower under control, and use a consistent range of motion. | Rest about 2–3 minutes between challenging sets. Reduce assistance only when you can complete the planned repetitions without swinging or shortening the movement. | Assistance setting and clean repetitions in each set. |
| 5 | Build supporting back strength | Add body-weight rows for 2–3 sets of 8–12 repetitions. Keep your trunk steady and pull your chest toward the support. | Use a body angle that lets you finish each set with good control. Make the angle harder gradually rather than rushing to a more difficult version. | Row variation, body angle, and repetitions. |
| 6 | Practise shoulder-blade control | Perform 2 sets of 6–10 scapular pulls: hang with control, draw the shoulder blades down, then return to the starting position without bending the elbows. | Use a secure bar and a comfortable range. Stop if you feel sharp pain or cannot maintain a stable shoulder position. | Controlled repetitions and comfort during the hang. |
| 7 | Use slow lowering repetitions carefully | If you can reach the top position safely, step up to it and lower yourself over about 3–5 seconds. Start with 2–3 sets of 2–4 repetitions. | Lowering repetitions can be demanding; include them sparingly and allow adequate recovery. Do not jump into the top position or drop from the bar. | Lowering time, number of repetitions, and next-day soreness. |
| 8 | Prioritise clean repetitions | Keep the body steady, avoid kicking or swinging, and use a consistent range of motion. End a set when your form starts to change. | Leave roughly 1–3 good repetitions in reserve on most sets. Rest 2–3 minutes after challenging sets, or longer if needed to restore control. | Form quality, rest time, and repetitions completed before technique changes. |
| 9 | Progress in small, trackable steps | When all sets reach the top of your target range with sound form for two sessions, add one repetition where possible or reduce assistance by the smallest available amount. | Change one difficulty factor at a time. If the new level causes shortened or uncontrolled repetitions, return to the previous level and build further. | Weekly sets and reps, assistance changes, and the date of each progression. |
| 10 | Support long-term progress | Keep a simple training log and review it every 4 weeks. Continue with a manageable routine instead of testing your maximum every session. | Prioritise regular sleep, meals, and rest days. If discomfort persists or worsens, pause the painful exercise and seek advice from a qualified health professional. | Training consistency, energy, recovery, and any persistent discomfort. |
General guidance: Adjust exercise choices and training volume to your experience, equipment, and recovery. Stop any movement that causes sharp or worsening pain.
Grip a sturdy overhead bar and raise yourself until your chin clears it. Your back and arms do much of the work. Keep your body controlled; avoid swinging. Clean reps matter more than rushed ones.
Try a comfortable 10-second hang or a few small shoulder-blade pulls with straight elbows. Stop if your form changes or you feel sharp pain. Write down the date and result. A notebook works.
Use a box to support your feet during hangs, or practice rows beneath a low, secure bar. A resistance band can also help. Choose enough support to move smoothly, not so much that it hides weak control.
Step onto a box to reach the top position, then lower yourself over three to five seconds. Keep your legs quiet. Step back onto the box between reps. No swinging.
Aim for two or three sessions each week, with a rest day between them. Try three sets of three to five controlled reps. Stop before your form breaks. More is not always better.
Record each variation, set, and repetition, and use the same grip and range of motion when retesting. Reduce assistance slightly when your sets feel solid. I once counted half-reps as progress. That made comparisons less useful.
Mild forearm fatigue can happen, especially when your grip works hard. Rest if your grip starts slipping. Sharp shoulder or elbow pain is different; pause and reassess. Seek qualified guidance if pain persists.
Review your notes every few weeks and choose one modest adjustment, such as slightly reducing assistance. Some days will feel weaker. That is information, not failure. Changing everything at once may only muddy the picture.
How to get better at pull ups for beginners? Start by understanding the movement and checking your baseline, such as how long you can hang from a bar or how many controlled assisted repetitions you can perform. Build the strength needed for a pull-up with grip holds, shoulder-control drills, and back exercises. Then practise the technique with scaled movements, focusing on a steady body position, engaged shoulders, and smooth control rather than rushing through repetitions.
Progress gradually from easier variations and assisted pull-ups toward unassisted repetitions. Choose a level that lets you maintain good form, and make small increases in difficulty as your strength improves. Consistent practice, sufficient recovery, and patience help you make lasting progress. Track your sessions so you can notice improvements over time, and adjust your plan when fatigue or technique suggests that you need more rest or an easier variation.

GoLive Fitness