A sweaty weight bench is more than an unpleasant surface. Sweat, skin oil, dust, and bacteria can collect around the pad seams, adjustment pins, and frame joints. A quick wipe may remove the shine, but it may not remove the residue. That small difference matters.
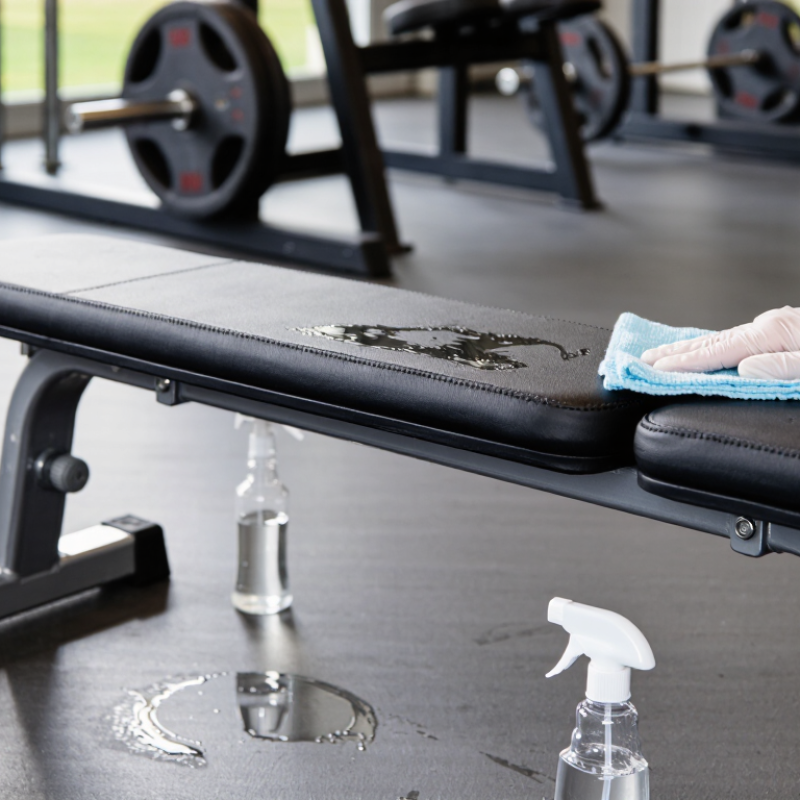
So, How to clean a sweaty weight bench? Start by checking the manufacturer’s care instructions. Some vinyl covers crack when exposed to harsh alcohol, bleach, or abrasive sprays. Use a clean microfiber cloth, warm water, and a gym-safe disinfectant approved for synthetic upholstery. Spray the product onto the cloth, not directly into the padding or metal joints. Wipe the bench from the headrest toward the seat. Pay close attention to stitching and areas where sweat gathers. Keep the surface visibly wet for the product’s stated contact time. Then allow it to air-dry completely.
Microbiologist Dr. Philip Tierno Jr. has described the gym as “a microbial jungle.” His warning gives this simple task more weight. A bench can look clean and still carry moisture in its seams. Drying is not an optional finishing touch. It helps protect the upholstery and limits lingering dampness. Gloves may help users with sensitive skin, although they are not a substitute for handwashing.
There is no perfect routine for every bench. Material, ventilation, and disinfectant instructions change the process. Still, wiping after every use is a reliable habit. Inspect the bench weekly for cracked vinyl or trapped moisture. If the surface smells sour, cleaning alone may not solve the problem. The padding may need professional assessment or replacement. That part is easy to overlook.
Assess Sweat Residue: Human Sweat Contains About 0.9% Sodium Chloride
How to Clean a Sweaty Weight Bench Properly?
Human sweat contains about 0.9% sodium chloride, or salt. That small amount matters on a weight bench. After repeated workouts, salty moisture can leave a stiff film on vinyl, seams, and frame joints. It may also hold body oils, skin particles, and odor-causing residue. The surface can look clean while remaining unhygienic.
Wipe the bench after every session with a clean, damp microfiber cloth. Use warm water and a small amount of mild soap for visible buildup. Do not soak the padding. Excess water can enter seams and create a slow-drying interior. Rinse the cloth often, because spreading salt around is not cleaning. Dry the surface completely with a separate towel. I have found that corners and adjustment gaps need extra attention. They are easy to miss.
Tips:
Check the material care instructions before using any cleaner. Test a hidden area first. Avoid harsh solvents, abrasive pads, and excessive disinfectant. For stubborn salt marks, place a lightly damp cloth over the area for a few seconds, then wipe gently. Clean metal parts separately and dry them immediately. Let the bench air out before storage. My routine is not perfect; sometimes I notice residue only under bright light. That is a useful reminder to inspect the bench from several angles.
Remove Debris With a pH-Neutral Cleaner Before Disinfecting
How to Clean a Sweaty Weight Bench Properly?
Sweat, chalk, and skin oils can collect along the bench pad, seams, and adjustment hinges. I have learned that disinfecting immediately is not enough. Loose debris can block cleaner contact and leave a sticky film behind. Wipe the entire surface with a dry microfiber cloth first. Pay attention to stitching and the narrow gap beneath the backrest.
Mix a small amount of pH-neutral cleaner with water according to its instructions. Apply it to the cloth, not directly onto the bench. A damp cloth is safer than a wet one. Work in gentle, overlapping strokes until the surface feels clean. For dried sweat, hold the cloth over the spot briefly. Do not scrape the upholstery. It may damage the protective coating.
Now disinfect the bench with a suitable surface disinfectant. Follow the required contact time carefully. The surface must stay visibly wet for that period. Avoid combining cleaning chemicals. Never flood seams, hinges, or adjustment pins. Wipe away excess moisture and let the bench air-dry fully before use. I sometimes rushed this step, and the remaining dampness caused an unpleasant odor. Check the material after drying; a cleaner that seems mild may still leave discoloration. Ventilation helps. So does patience.
Apply an EPA-Registered Disinfectant for Its Full 1–10-Minute Contact Time
A sweaty weight bench needs more than a quick wipe. Sweat, skin oils, and dust can settle into the vinyl texture and stitching. I begin by removing plates, towels, and loose debris. Then I clean visible grime with mild detergent and water. Disinfectant cannot work properly through a dirty film.
Choose an EPA-registered disinfectant labeled for hard, nonporous gym surfaces. Read the product label carefully. The listed contact time may range from one to ten minutes. Keep the bench visibly wet for the full time. Do not spray and immediately wipe it dry. That mistake is easy to make. I once rushed this step between sets, and the surface dried too soon. The process looked finished, but it did not follow the label.
Use disposable gloves and keep air moving in the room. Spray the cloth or surface as directed, especially around the headrest, adjustment gap, and front edge. Avoid soaking foam, hinges, or electrical parts. A timer helps when the required time feels unusually long. If the label requires rinsing, use a clean damp cloth afterward. Otherwise, allow the surface to air-dry completely before training.
Inspect the bench after cleaning. Cracked vinyl, exposed foam, and loose seams need separate attention because disinfecting cannot repair damaged materials. Test the product on a hidden area first. Some surfaces react badly, even when the cleaner appears gentle. Regular cleaning is useful, but my routine still needs adjustment after crowded workouts or heavy summer use.
Protect Vinyl and Foam by Avoiding Abrasives, Solvents, and Excess Water
A sweaty weight bench needs prompt cleaning, especially after intense sessions. Sweat contains salt and oils that can slowly dry the vinyl and make the surface tacky. I use a soft microfiber cloth, lukewarm water, and a small amount of mild soap. The cloth should be damp, not dripping. Excess water can seep through stitched edges and weaken the foam beneath.
Wipe the bench from the headrest toward the foot end, paying attention to seams and adjustment gaps. A soft toothbrush can lift residue from shallow grooves without scratching the coating. Avoid abrasive pads, powdered cleaners, and stiff brushes. They may leave tiny marks that become more visible over time. Solvents are also risky. Alcohol, strong degreasers, and harsh disinfectants can strip protective finishes or make vinyl brittle. Test any unfamiliar cleaner on a hidden area first.
I once sprayed cleaner directly onto a bench, and moisture collected around the frame. That was careless. Now I spray the cloth instead and dry the surface with a second towel. Leave the bench uncovered until it feels completely dry. Inspect loose stitching, peeling edges, or flattened foam during cleaning. A damaged cover may need professional repair rather than stronger chemicals. Cleaning after each workout is ideal, but I sometimes miss a day. When that happens, I clean the bench gently and give the residue more time to loosen instead of scrubbing harder.
Dry Completely and Inspect Seams After Every High-Sweat Training Session
How to Clean a Sweaty Weight Bench Properly?
A high-sweat training session leaves more than visible moisture. Sweat, skin oils, and fabric fibers collect around the pad, frame, and adjustment points. NSF International’s 2011 Germ Study found exercise equipment carried up to 362 times more bacteria than a toilet seat. That figure is old, but it still shows why routine wiping matters.
Remove loose towels and debris first. Use a cleaner approved for gym upholstery, following its contact-time instructions. Wipe the entire pad, including its underside and adjustment hinges. Do not flood the seams. Trapped liquid can weaken stitching, create odors, and encourage hidden microbial growth. A clean cloth should reach the narrow gap where the back pad meets the frame.
Dry completely.
Leave the bench uncovered until every surface feels dry, not merely warm. The CDC notes that some germs, including MRSA, can survive on surfaces for hours, days, or weeks. After every high-sweat session, inspect seams for dark lines, lifting, cracking, or dampness. Press gently along the stitching and check beneath the pad. I used to wipe only the top surface. That missed the dirtiest areas.
If moisture remains, use ventilation and a dry towel rather than storing the bench immediately. Avoid harsh solvents unless the equipment’s care guidance permits them. Document recurring seam damage and replace compromised padding when cleaning no longer restores a hygienic surface.
FAQS
Sweat, skin oils, and dust can block the disinfectant. Remove debris, then wash grime with mild soap and water.
Follow the label’s contact time, usually one to ten minutes. Keep the surface visibly wet throughout.
No. Immediate wiping may shorten the required contact time. Use a timer when the surface dries quickly.
Focus on the headrest, stitching, adjustment gaps, and front edge. Residue often collects in these narrow spaces.
Use a damp microfiber cloth, lukewarm water, and mild soap. The cloth should not drip.
Avoid abrasive pads, powdered cleaners, stiff brushes, solvents, and harsh degreasers. They may damage the protective finish.
Spraying the cloth is safer. Direct spraying can send moisture into seams, hinges, foam, or electrical parts.
Inspect peeling edges, loose stitching, exposed foam, and flattened padding. Stronger chemicals will not repair them.
Clean gently and let residue loosen longer. Scrubbing harder may create scratches, though I sometimes forget this.
Yes. Apply it to a hidden area first. Some surfaces react badly, even with seemingly gentle cleaners.
Conclusion
How to clean a sweaty weight bench? Start by recognizing that sweat leaves behind salts, oils, and moisture; human sweat contains roughly 0.9% sodium chloride, which can gradually affect vinyl, stitching, and metal parts. Remove loose dirt and debris first with a soft cloth and a pH-neutral cleaner. Cleaning before disinfecting helps the disinfectant work more effectively and prevents residue from being rubbed deeper into the bench surface.
Next, apply an appropriate EPA-registered disinfectant and keep the surface visibly wet for the full stated contact time, which may range from one to ten minutes. Avoid abrasive pads, harsh solvents, and excessive water, as they can damage vinyl and foam or seep into the padding. After treatment, wipe away remaining moisture and allow the bench to dry completely. Following every high-sweat training session, inspect seams, edges, and attachment points for trapped moisture, buildup, or early signs of wear.

 GoLive Fitness