Why Learn to Safely Fail a Squat Alone?

Time:2026-09-23 Author:Sophia
0%

Training alone can make a squat feel controlled until the bar suddenly stops moving. Your knees may soften, your chest may collapse, or the bar may pull you forward. In that moment, panic is often more dangerous than the failed repetition. This introduction explores the question, “How to safely fail a squat alone?” It focuses on preparation, equipment, movement control, and calm decision-making.

Dr. Aaron Horschig, physical therapist, strength coach, and founder of Squat University, emphasizes a simple priority: “Get out of the way of the bar.” That principle deserves careful attention. A properly adjusted power rack, correctly positioned safety pins, and a clear training area can reduce serious risk. The bar should rest on the safeties before your body reaches its limit. Test the setup with an empty bar. Practice lowering the bar safely. Small details matter.

Do not use collars when training alone. If a forward failure occurs, guide the bar away and step backward, without twisting. If the bar moves behind you, release it and move forward quickly. Never try to save a maximal repetition with a painful or unstable position. That decision may feel embarrassing. It may also protect your spine.

This topic is not a promise of perfect safety. Mistakes happen. Even experienced lifters misjudge fatigue. The aim is better preparation, not reckless confidence. By learning how to recognize a failing squat and rehearsing a controlled escape, solo training becomes more responsible, practical, and repeatable. Safety still requires judgment. Incomplete practice remains a weakness.
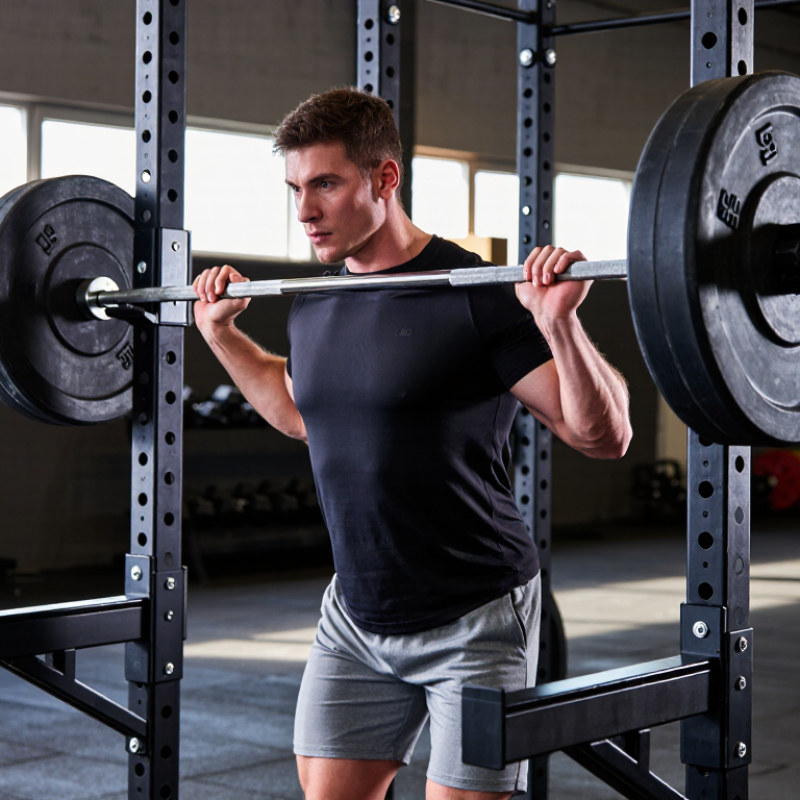
Why Learn to Safely Fail a Squat Alone?

Why Learning to Safely Fail a Squat Alone Matters

Why Learning to Safely Fail a Squat Alone Matters

A failed squat rarely begins with dramatic warning. Your hips slow, your chest folds, and the bar suddenly feels much heavier. Learning to respond matters when no spotter stands nearby.

A properly adjusted rack can catch the bar before it traps you. Set the safety arms just below the lowest point of your squat. Test them with an empty bar. Keep your feet stable, then lower the bar onto the safeties if you cannot stand. Do not twist or panic. Step forward only when the bar is secure.

The risk deserves respect. An American Journal of Sports Medicine analysis of U.S. NEISS data estimated 970,000 weight-training injuries from 1990 through 2007. Free weights caused about 90% of reported injuries. The National Strength and Conditioning Association also emphasizes equipment setup, controlled technique, and appropriate supervision in resistance-training safety guidance.

These figures do not predict your session, but they challenge casual confidence. I still rehearse the escape with light loads. It feels awkward, almost theatrical. That awkwardness is useful. Many lifters practice successful repetitions, yet never practice the moment strength disappears.

A solo lifter should also avoid collars when a controlled bar release may be necessary, depending on the rack design and local coaching standards. This choice requires judgment, not a universal rule. Set the pins, check the floor, and use a load you can abandon without rushing.

When a Solo Squat Failure Can Happen

Why Learn to Safely Fail a Squat Alone?

A solo squat failure can happen when fatigue changes your movement without warning. Your hips may rise first, your knees may collapse inward, or your balance may shift backward. The final repetitions often feel different from the first ones. A weight that moved easily can suddenly stop at the bottom. Poor sleep, rushed warm-ups, dehydration, or an underestimated load can increase that risk. Distraction matters too. One loose shoe or an uneven stance may change the lift.

A properly adjusted rack is essential for training alone. Set the safety arms slightly below your lowest squat position, then test them with an empty bar. They should catch the bar without forcing you to bend or twist dangerously. Keep the area clear, and avoid adding weight until you can control the descent. If the bar stops moving upward, do not fight for several seconds. Stay calm, guide it toward the safety arms, and move away from the bar when it settles. Never depend on strength alone.

Practice the escape with light weight first. A qualified coach can check your rack height, stance, and release technique. Some lifters rehearse this once and assume they are ready. That confidence may be misplaced. I would still retest the setup after changing shoes, bar position, or squat depth. Heavy solo squats demand judgment, not bravery. Without reliable safety arms, heavy attempts alone are a poor choice.

Why Learn to Safely Fail a Squat Alone? — When a Solo Squat Failure Can Happen

Failure Scenario Common Trigger Early Warning Signs Safer Solo Response Risk-Control Check
Stalling at the bottom The load is too heavy to reverse direction after reaching maximum depth. The hips stop rising, bar speed drops sharply, or the torso folds forward. Stay controlled, keep the chest from collapsing, and lower the bar toward the safety supports if they are correctly positioned. Set safety supports just below the lowest safe squat position before lifting.
Loss of balance forward Fatigue, limited ankle mobility, or excessive forward torso movement shifts the load beyond the base of support. The heels lift, the bar moves toward the toes, or the torso pitches rapidly forward. Do not attempt a twisting recovery. Move away from the bar only after it is safely supported or released in a controlled direction. Use stable, non-slip flooring and maintain a clear area around the rack.
Loss of balance backward The bar travels behind the mid-foot or the lifter overcorrects after a forward shift. The hips move behind the heels and the bar path drifts backward. Release the bar backward only when the area is clear and the rack setup permits a controlled drop. Keep walls, furniture, pets, and other obstacles outside the potential bar path.
Uneven ascent or side shift Unequal leg drive, fatigue, stance changes, or a bar that is not centered. One hip rises faster, one knee collapses inward, or the bar tilts noticeably. Stop forcing the repetition; return the bar to the supports if possible and avoid rotating under the load. Center the bar, use symmetrical plates, and check that the rack is level and stable.
Grip or upper-back fatigue Long sets, insufficient rest, or a bar position that cannot be maintained. The elbows flare, the upper back rounds, or the bar begins to roll. Rack the bar before posture deteriorates; do not attempt another repetition to reach a target number. End the set when technique changes, rather than relying on an absolute repetition target.
Sudden dizziness or weakness Dehydration, inadequate food intake, overheating, illness, or excessive exertion. Light-headedness, blurred vision, nausea, unusual breathlessness, or loss of coordination. Abort the set immediately, secure or discard the load safely, and sit or lie down in a clear area. Do not train alone when unwell; keep water, communication access, and an emergency plan available.
Equipment or setup failure Loose rack hardware, poorly fitted supports, damaged equipment, or plates that are not secured. Wobbling, unexpected movement, rattling, slipping collars, or supports at different heights. Stop the session and unload the bar only when it is stable; do not continue to test questionable equipment. Inspect the rack, supports, collars, bar, and flooring before every solo session.
Solo Squat Readiness Checklist: Confirm correctly positioned safety supports, a stable rack, clear bar-release space, manageable load selection, secure footwear, and a communication method. Practice the escape or bar-release technique with an unloaded bar before attempting heavy squats.

How to Prepare a Squat Rack for Safe Bailouts

Learning to fail a squat alone begins before the plates touch the bar. I once set safety pins by eye. That was a mistake. A rack must match your height, stance, bar path, and bailout direction. Research using U.S. Consumer Product Safety Commission NEISS records has documented nearly one million weight-training injuries. The figure does not prove racks cause injuries. It does show why preparation deserves attention.

Set the safety pins or straps just below the bar at your lowest controlled squat. They should catch a collapsing bar without blocking your normal descent. Test the position with an empty bar. Squat slowly, pause, and check clearance from different angles. Add weight gradually. Test it empty. Keep the floor clear, and lock every adjustable component before lifting. If your equipment instructions distinguish between secured and sliding plates, follow them carefully. Never twist while escaping. Guide the bar toward the safeties, step away, and protect your hands and knees.

The American College of Sports Medicine emphasizes controlled technique, gradual progression, and individualized loading in resistance-training guidance. Those principles matter more when nobody is standing behind you. Leave repetitions in reserve during solo sessions, especially after poor sleep or heavy work. A mirror can help, but it cannot replace inspection. My setup still is not perfect every time. That is the uncomfortable lesson. Recheck the pins before every serious set.

Step-by-Step Techniques for Escaping a Failed Squat

Learning to escape a failed squat matters because fatigue can erase careful technique quickly. A systematic review published in Sports Medicine reported resistance-training injury rates of roughly 0.2–4.4 injuries per 1,000 training hours, depending on the population and definition used. Most failures are manageable. A poorly placed bar can still cause serious harm.

Before lifting alone, set the safety pins just below your lowest squat position. Test them with an empty bar. If you miss the ascent, stay calm, brace briefly, and guide the bar onto the pins. Do not twist your spine to save the repetition. If no pins exist, step forward while pushing the bar behind you, then move away immediately. Never try to catch it. For a front squat, lower the bar forward and step back. Practice these movements with light weight, because panic changes everything. I still find this part uncomfortable. That discomfort deserves attention.

Tips: Keep the walkout short. Use a controlled depth. Stop when your hips rise faster than your shoulders. Train failed-rep escapes with an empty bar and clear flooring. ACSM resistance-training guidance supports gradual loading and controlled technique, while NSCA coaching principles emphasize equipment checks and planned emergency actions. Those recommendations are not permission to lift recklessly. A safety pin set one inch too low may be useless. Test it again.

Why Learn to Safely Fail a Squat Alone?

Step-by-step techniques for escaping a failed squat

This chart counts the key actions in a conservative solo-failure sequence: prepare the rack, control the descent, abandon the lift safely, and clear the bar. The safest setup uses adjustable safety pins or arms, avoids collars when training alone, keeps the chest from being trapped under the bar, and practices the escape with an empty bar before adding weight.

How to Recover and Improve After a Failed Squat

A failed squat is not a personal failure. It is useful training information, especially when you lift alone. Before loading the bar, set the safety pins just below your lowest squat position. Test them with an empty bar. If the bar reaches the pins without trapping you, the height is probably suitable.

After a missed rep, stay calm and avoid twisting. Lower the bar onto the pins, or step forward carefully if your rack allows it. Move away only when the bar is stable. Then check your breathing, balance, and any sharp pain. Do not immediately repeat the same weight. Rest, record what happened, and ask why the rep failed. Was the descent too fast? Did your hips rise first? Was the load simply too heavy? I sometimes blame technique too quickly. Fatigue, poor sleep, or weak bracing may also matter. Reduce the load by 5 to 10 percent and rebuild control. Use slower repetitions, paused squats, or lighter volume during the next session.

Tips: Brace before unlocking the bar. Keep your feet planted. Stop if pain feels sharp or unusual. Review a video from the side, if available. Small corrections usually beat dramatic changes. Never treat a failed squat as proof that you must train harder immediately.

FAQS

Why should I learn to fail a squat safely alone?

Strength can disappear without much warning. Your hips may slow, and your chest may fold. Practicing the escape reduces panic. It feels awkward. That awkwardness helps.

How should I set the safety arms?

Set them slightly below your lowest squat position. Test the height with an empty bar. The bar should land securely without trapping you. Recheck after changing shoes, bar position, or squat depth.

What should I do when the bar will not rise?

Stay calm and avoid twisting. Guide the bar toward the safety arms. Lower it onto them if possible. Move away only after the bar becomes stable. Do not fight the failed rep for several seconds.

What conditions can make a solo squat fail?

Fatigue can change your movement suddenly. Poor sleep, dehydration, rushed warm-ups, and excessive weight may contribute. Distraction also matters. One loose shoe can affect your stance.

How can I practice the escape safely?

Use an empty bar or a very light load. Rehearse lowering the bar onto the safeties. Keep your feet planted. A qualified coach can check your rack height and movement.

Should I use collars during solo squats?

The choice depends on your rack design and coaching standards. Some lifters may need a controlled bar release. This is not a universal rule. Judgment matters more than habit.

What should I do after missing a squat repetition?

Check your breathing, balance, and any sharp pain. Do not immediately repeat the same weight. Record what happened. Maybe fatigue mattered more than technique. I sometimes blame technique too quickly.

How should I improve after a failed squat?

Reduce the load by about 5 to 10 percent. Use slower repetitions or paused squats. Review a side-view video, if available. Small corrections usually work better than dramatic changes. Recovery comes before proving anything.

Conclusion

Learning how to safely fail a squat alone? is an essential skill for anyone who trains without a spotter. A failed repetition can happen because of fatigue, poor balance, incorrect weight selection, or an unexpected loss of strength. Preparing in advance helps reduce panic and injury risk. Set the safety bars or arms slightly below the lowest point of your squat, test their height with an empty bar, and keep the area clear so you can move safely.

If you cannot stand, stay calm, guide the bar onto the safety supports, and avoid twisting or attempting to save a dangerous repetition. Depending on the rack setup, you may carefully step or move forward out from under the bar once it is secure. Afterward, check for pain, rest, and seek professional medical advice if symptoms appear. Review your technique, training load, depth, and fatigue level, then use the experience to improve future preparation and confidence.

Sophia

Sophia

Sophia is a dedicated marketing professional with an exceptional depth of knowledge about her company's products and services. With a keen understanding of market trends and customer needs, she crafts insightful blog posts that not only inform but also engage readers, enriching the company’s online......